Introduction.
The submap GBVM instructions allow you to copy rectangular sections of background tiles to any position on the overlay. When I first learnt what submaps do, I didn’t think they sounded too exciting. However, copying background tiles to anywhere on the overlay is an incredibly powerful tool with a lot of different applications. It’s great for detailed HUDs and complex custom menus. The best part is that the GBVM instructions are some of the easiest to learn. In this guide, we’ll explore how to use the submap GBVM instructions, and then move onto some cool things you can use them for.
Opening the overlay.
Before we copy background tiles to the overlay, we probably want to open the overlay and make it visible on the screen. Use the VM_OVERLAY_SHOW instruction for this.
Below is an example instruction that covers the whole screen with the overlay. It uses VM_OVERLAY_SHOW to show the overlay with the top left corner at position (x = 0, y = 0) with a blank white background and no extra options.
VM_OVERLAY_SHOW 0, 0, .UI_COLOR_WHITE, 0
Alternatively, below is an example instruction that covers the bottom two rows with the overlay with its top left corner at position (x = 0, y = 16).
VM_OVERLAY_SHOW 0, 16, .UI_COLOR_WHITE, 0
Depending on your application, you may also want to show sprites on top of the overlay. We can achieve that with the following instruction.
VM_SET_CONST_UINT8 _show_actors_on_overlay, 1
VM_OVERLAY_SET_SUBMAP.
VM_OVERLAY_SET_SUBMAP copies a rectangular area of background tiles to the overlay. It only takes constants as parameters, not variables. It takes the following parameters in order, where all numbers are in 8px tiles. The positions to copy to and from represent the top left corner of the rectangular area to copy.
- X coordinate of the overlay position to copy to
- Y coordinate of the overlay position to copy to
- Width of the rectangular area to copy
- Height of the rectangular area to copy
- X coordinate of the background position to copy from
- Y coordinate of the background position to copy from
Below is an example of copying an 8 tile by 10 tile area (16px by 16px) from the top left corner of the background to the bottom right corner of the overlay. Note that the background can be any size and you can copy from any part of it, even if it’s not currently on screen.
VM_OVERLAY_SET_SUBMAP 12, 8, 8, 10, 0, 0
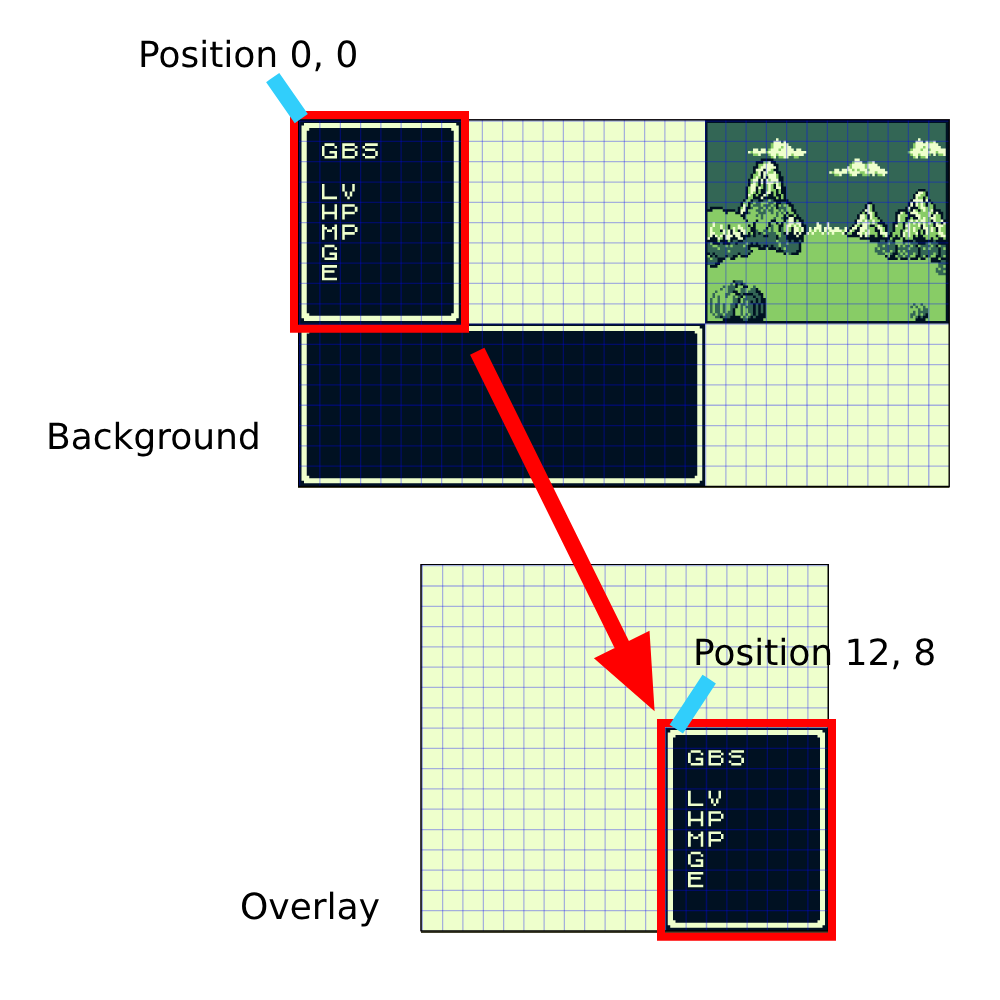
The result of the above instruction.
VM_OVERLAY_SET_SUBMAP_EX.
VM_OVERLAY_SET_SUBMAP_EX works the same way but takes values from the stack as parameters. The parameters are in the same order, and can be variables, constants, or anything else you can push onto the stack. This is useful for dynamic copying of different tiles, like copying tiles from the player’s position.
Below is an example of copying a 16px square from a background position stored in variables to an overlay position stored in variables. It uses RPN (math mode) to push values to the stack. I like doing that because it’s easy to write, but you can push however you like.
VM_RPN .R_REF VAR_OVERLAY_X .R_REF VAR_OVERLAY_Y .R_INT16 2 .R_INT16 2 .R_REF VAR_BACKGROUND_X .R_REF VAR_BACKGROUND_Y .R_STOP VM_OVERLAY_SET_SUBMAP_EX .ARG5 VM_POP 6
Adding HUD backgrounds with submaps.
The first and easiest application of submaps is adding a background to overlay HUDs. If you followed the GBVM overlay HUD tutorial or have a similar setup, it’s super easy to add a background using submaps.
Add the image you want to use as a HUD background to your scene background. You probably want to position it where it will be covered up by the overlay HUD during gameplay. Then use VM_OVERLAY_SET_SUBMAP to copy the background to your overlay immediately after you initially open the overlay with VM_OVERLAY_SHOW. Now instead of having a blank white overlay, your submap is applied to the background.
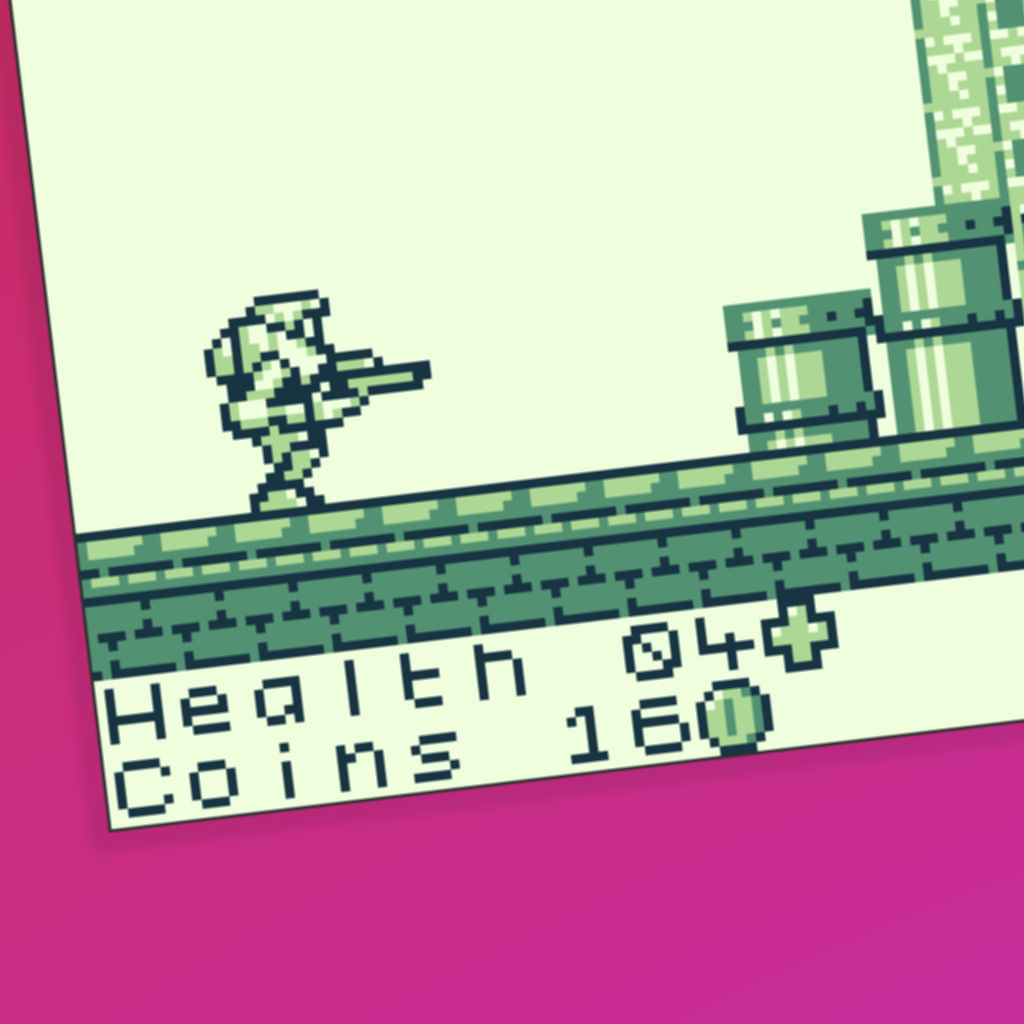
The background was added to this overlay HUD using the method described above, and nothing more! The healthbar and score are then drawn over the top as text. By the way, this game is currently in development.
Making RPG menus with submaps.
By covering the whole screen with the overlay, you can dynamically draw windows using submaps wherever you like. Combine that with the text drawing instructions in the GBVM overlay HUD tutorial, and you can make complex RPG menus.
Below is an RPG battle menu example where I covered the whole screen with the overlay. I then copied each part of the menu from the background to the overlay using submap instructions. Each time I need to update the text in a box, I use submap instructions to copy the box from the background again, which will overwrite any text found there. Then I write the new text over the top.
By repeatedly copying from the background and overwriting what is on the overlay, you can make many complex menus with opening and closing windows. There are probably other applications for this that I haven’t explored such as animation.
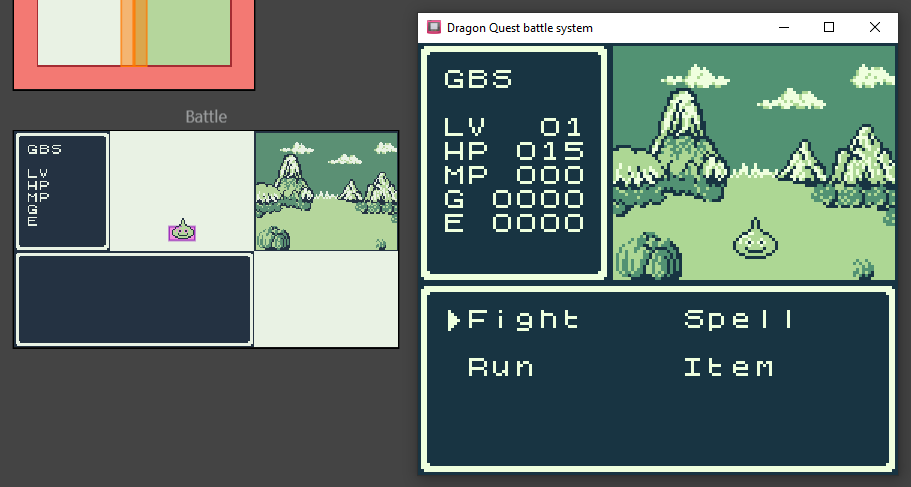
This screen was made by copying parts of the background to the overlay and then drawing text over them. It also uses the menu GBVM commands to add the selection arrow. Read the docs if you want to know more.
Creating gameplay using submaps.
By covering the whole screen with the overlay, you can also treat the overlay as the background and use submap commands to basically carry out ‘tile swapping’, except you don’t have to worry about tile banks or unique tiles. This is the main reason I mentioned the instruction for showing actors over the overlay at the start of this guide.
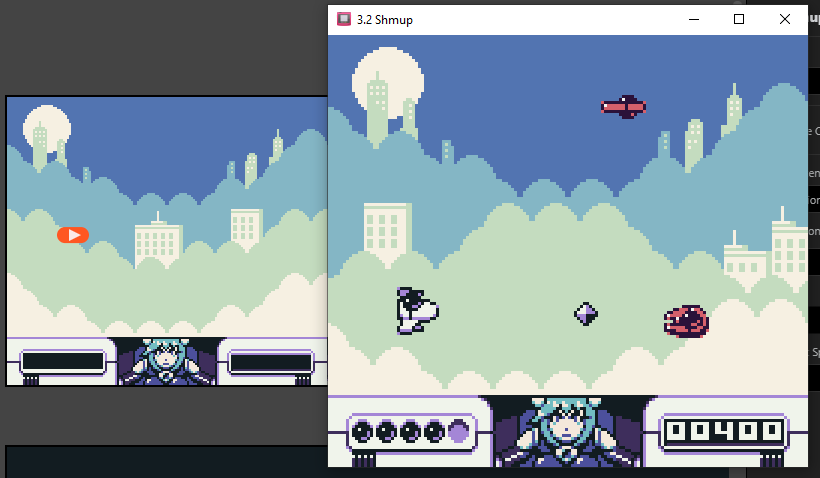
Here is an example where I set up a simple farm using VM_OVERLAY_SET_SUBMAP_EX. It copies farming plots from the background. Variables keep track of what is planted in each farming plot, which are used by VM_OVERLAY_SET_SUBMAP_EX to copy the appropriate tile from the background. This could be done with tile swapping if you made all of the tiles unique, but submaps are so easy to use.
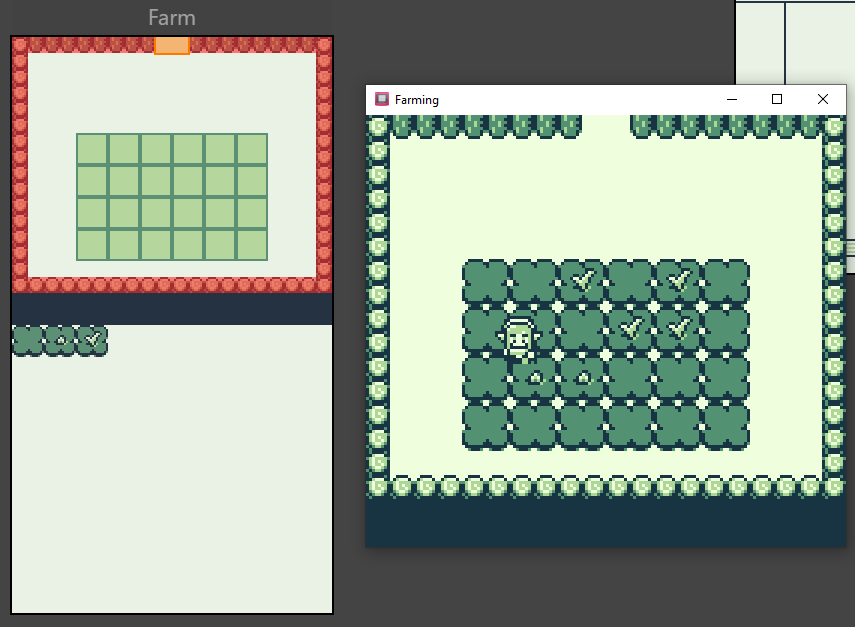
OMG is that Stardew Valley on Game Boy? Take my money!
Conclusion.
The above examples are rather complicated and I haven’t given full instructions. However I hope they serve as inspiration and ideas for what can be done with submaps. The commands themselves are simple, but the applications could be infinitely complex. I think there is a lot of unexplored potential for submaps in GBS, and I want to see your games made with them!
Guide by Shin. Last updated 26/02/2024.