Intro.
Making cutscenes in GB Studio is both simple and tricky at the same time. This guide will show you how to make attractive GB Studio cutscenes with multiple actors moving at the same time, and make them skippable.
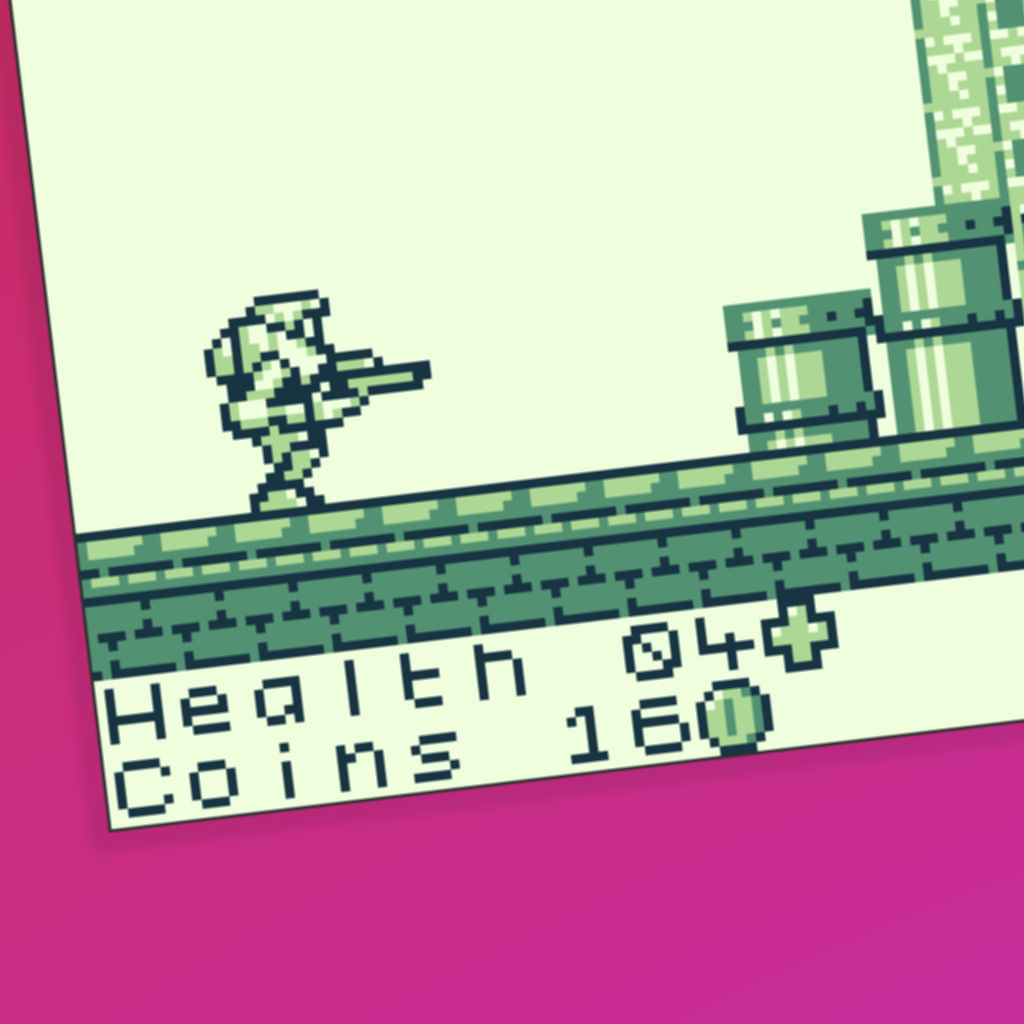
I’m going to use the opening screen from Hungry in the Dungeon as my example, a little action dungeon crawler I made at the start of 2025. Give it a play if you want to see some more cutscenes in action.

You need to play Hungry in the Dungeon. But finish this guide first!
By the way, this guide only works for GB Studio 4 and up, because it requires threads. However, you can achieve pretty much the same thing in earlier versions by using an invisible actor’s On Update script instead.
Setting up the scene.
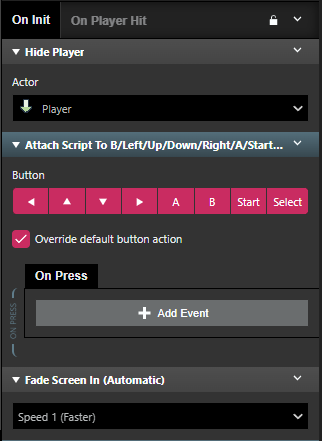
Make a new scene using any scene type. You’ll probably want to avoid Logo, since it prevents you from using actors and text.
In the scene’s On Init script, before the Fade In event, add a Hide Player event and a blank Attach Script to Button event overriding all of the buttons. This means we don’t have to worry about the player walking around the screen while the cutscenes plays. If you want the player character to appear in the cutscene, you can use an actor with the same sprite as the player instead.
Setting up the main thread.
The main cutscene logic is going to go in a thread. The thread will run simultaneously alongside actor scripts, and won’t block player input.
Name a new variable “Cutscene thread.” In the scene’s On Init script, after the Fade Screen In event, add a Thread Start event and set the Thread Handle to the variable “Cutscene thread”.
Inside the thread add a Wait event for the length of the cutscene, and then add a Change Scene event that changes to the next scene after the cutscene.
You can also add any other events you want in the thread, such as movement, sound, text or camera events. In this example I added a Draw Text event at the start so the story text would be drawn to the screen.

Setting up the actors.
Now you can add any actors you like to the scene. If you put logic inside their On Update scripts, it will run simultaneously alongside the main thread.
In this example, I added bird actors with simple Move Relative events in their On Update scripts. I also added lens flare actors with simple Move events in their On Update scripts
You should also add a Disable Collision event in the On Init of each actor to disable its collision. This will improve the performance of your cutscene, even if the actor's sprites have no collision bounding box.
Making the cutscene skippable.
Because we have only used threads and On Update scripts, the player’s input is not blocked by any scripts, and we can make the cutscene skippable.
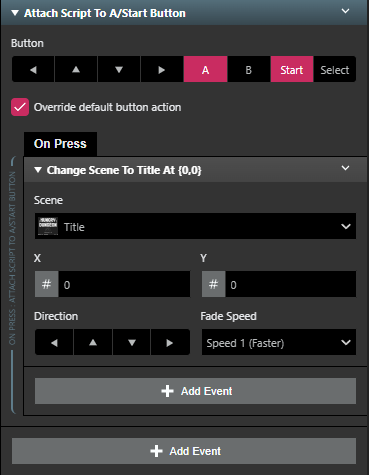
Add an Attach Script to Button event at the end of the scene’s On Init script. In the Attach Script to Button event, add a Change Scene event that changes to the desired scene after skipping.
That’s it!
It’s quite a specific setup, but it’s easy to assemble. Now that you can make skippable cutscenes with multiple actors, let your imagination run wild! You could also add more threads or more actors with On Update scripts to make even more stuff happen simultaneously. Have fun!
You finished the guide... go play Hungry in the Dungeon! Just kidding, you probably need to make some cutscenes of your own first.
Guide by Shin. Last updated 12/3/2025.